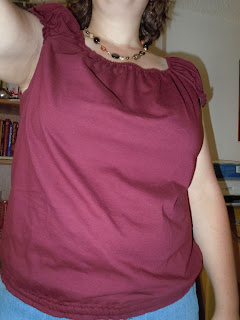
I happened upon a $3 men's t-shirt at JCP a few months back and finally got a chance to "upcycle" it. :o) First off, I wear an XL and decided to buy a XXL so I'd have more fabric to play around with, but going up a full size probably isn't necessary.
I started the project by turning the shirt inside out.
 |
| cutting out the shirt front and back |
Here is how I figured the length of the shirt front and back:
- I measured myself from where I wanted the neckline to be down to the point I wanted the hem to be (22"), added 1" to it for casing allowance at the neckline (23"). This became the length for the middle of my shirt. Note: after wearing this shirt a few times I would make the back of the shirt 1"-2" inches longer than the front of the shirt.
- I measured myself from under the armpit to where I wanted the hem to fall (16") and added 1" for seam allowance. This became the length for the side of my shirt.
Here is how I figured the width of the shirt:
- I took my hip measurement, added 6" to it, and divided that measurement by 2 (46+6=50, 52/2=26). This became the width for sides of my shirt.
- I took the width of my over-bust (just the front from sleeve seam area to sleeve seam area) and multiplied it by 1.5. This became the width for the top of my shirt.
- I just messed around with the armhole area using my tailor's chalk between the neckline and the armpit point till it looked about right.
 |
| the sleeves and shirt front |
For the sleeves, I didn't do any measuring, I just cut things out.
However, after wearing the shirt a few times I would make a couple of changes, 1. I would cut the back of the sleeve wider than the front, and 2. I would not make them as wide from front to back as I did. There is just more "poof" to the sleeve than I would normally like.
 |
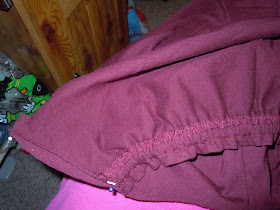
I sewed a line 1/2" below the bottom hem line to make a casing for the elastic.
Next time I make this shirt I plan to skip the elastic because it makes the shirt creep up when I sit.
I may add a band of fabric instead or just leave it as is. |
 |
| sewing the "casing" on the sleeves just like I did with the hem |
 |
| adding the elastic to the sleeve hem |
 |
adding the elastic to the hem of the shirt.
again, I probably wouldn't do this the next time. |
 |
| sew the shirt front and back together and turn right side out. |
 |
| once you have the elastic in the sleeve, sew it to the shirt. |
|
- Once you have the sleeves sewn in, fold the neckline over 3/4" and sew at the 1/2" mark to create a casing for the elastic at the neckline.
- Then add some 3/8" elastic and pull tight till the neckline falls where you'd like it to.
- Sew the elastic ends together and close the case.
- Then fold the area under the armpit over about 1/2" and hem it.
 |
| the finished product |
Hopefully my directions are clearer than mud. :o) This is a really versatile idea. I am also using it to create some nightgowns for Miss E and Miss A out of Jared and my pre-weightloss t-shirts. I'll post some pictures of those once they are finished.


That is a neat idea! We took children's t-shirts and a mans t-shirt and made night gowns for the girls when they were small. Michelle Navis
ReplyDelete