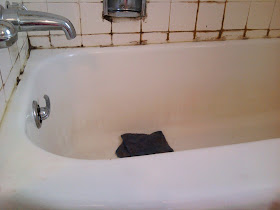
I had seen a tub refinished on one of those DIY shows a few years and checked out a couple of stores for the product I'd seen but no one carried it. I figured Amazon sells pretty much everything and sure enough for less than $25 I was able to get a Tub & Tile Refinishing Kit in white (Rust-Oleum offers a couple of other colors as well). At less than $25 a kit, I gave it a shot and was amazed at how nice our tub looks! Here are some before and after pictures.
 |
| The tile went almost to the ceiling previously and you can see what kind of shape the tub was in |
 |
| We tore the tile out and put in a tub surround |
 |
| See how dingy the tub looks compared with the surround |
 |
| Can you tell the difference? |
 |
| It looks like a whole new bathroom! |
 |
| This has nothing to do with the tub refinish, but I just had to share my great find. These light fixtures were originally $40 each and I got them for $10 each. |
Some notes on the refinishing kit:
- It has a VERY potent odor and can make you feel a bit loopy so be sure you have REALLY good ventilation
- Definitely use painters tape as it does NOT come off easily if you get some on the floor or surrounding area
- The kit says to remove all your hardware but we just covered them with aluminum foil and duct tape, which worked just fine but I am a perfectionist so I even used a razor blade to get everything perfectly taped off
- It does take 6-8 hours from start to finish depending on how long it takes you to do the prep steps (there is a fairly involved cleaning process). Once you finish the prep work you can put the enamel on in one hour intervals. There is enough enamel to do 3 coats but it was getting quite late when I finished the 2nd coat (2am) so I decided to be done.
Pros -
- It's inexpensive (less than $50 total between the kit, cleaning supplies, and special rollers)
- It's fairly easy work
Cons -
- It's takes a chunk of time - once you mix the two parts you have to finish the project as you only have 6-8 hours of use
- It has to cure for 3 full days so it might pose a problem if you're refinishing your only shower/tub area, we made sure to do it the night before leaving on a 3 day trip
Here is a link to the product we used.


No comments:
Post a Comment